
58 Ways to Stay-N-Play at Home: Winter 2022 Edition
It’s cold, it’s dark, and we are all home. So, here is a list of ways to stay and play at home adjusted for this season. Fingers crossed we get more snow, because snow play can take up an entire morning!
Snow Play
Build a Snowman: Then label body parts, clothing items, and use spatial concepts in order to build your child’s vocabulary.

Snow Angels: Describe how to make it and then make one together. Which angel is bigger?

Snow Paint: Liquid watercolors are a perfect way to color the snow and can be spread via a spray bottle or a paint brush. What colors are you using?

Snow Gems: Create these gems by freezing colored water in an ice cube tray and then take them outside to hide or make a design in the snow. These gems sure do make a gorgeous color contrast to the white snow.

Frozen Bubbles: Blow bubbles in the frigid temperature and talk about what happens. Check out Housing a Forest for a frozen bubble how to.

Snow Tray: Bring the snow inside if it’s too cold to be outside. How does the snow feel? Can you make designs in the snow on a tray?

Snow Bins: If there’s enough snow, make a snow sensory bin. Use markers, spray bottles with liquid watercolor, or paint brushes to paint the snow.

Ice Lanterns: Take advantage of the fringe weather by freezing water in different size Tupperware containers. Once froze, slide the form out of the container and place a candle inside. Makes for a beautiful luminary.
Kitchen Utensil Play
Salad Spinner Play: Place different items in the salad spinner (balls/glow sticks/bells) and see what happens when the basket starts spinning.

Tupperware Play: Pull out the Tupperware and start matching lids, nesting, and stacking.
Muffin Tin Sorting: Find objects around the house that will fit in the muffin tin (balls/cotton balls/plastic Easter eggs). Place the items in a bowl and use hands/spoon to transfer the items from a bowl to the muffin tin.
Pot & Pan Drum Set: What kid doesn’t love banging the kitchen utensils on the pots & pans?
Kitchen Pantry Play
Homemade Play Dough: Mix 3 cups flour, 1.5 cups salt, 6 tsp cream of tartar, 6 tbsp oil, 3 cups water, and food coloring in a pot. Stir over low heat until a ball forms. Et Voila!

Cloud Dough: The original recipe calls to mix 8 cups of flour with 1 cup of oil. I often half the recipe.
DIY Sand: Mix together 1 cup cornmeal, 1 cup flour, 2 tbsp oil, and 2 tbsp corn syrup. You can build up, knock down, roll, squish, etc.
Oobleck: Also known as cornstarch and water and a hit with all ages. Start with cornstarch and add water until you find a consistency you like. Our recipe is generally an approximate 2:1 ratio of cornstarch to water. There is something mesmerizing about the consistency.

Colored Rice: Shake 1 cup rice, 1 tbsp vinegar, 3 drops food coloring in a tightly sealed container and let dry for an hour. Place in a container and fill, dump, shake, and throw.
Cooked Noodles: Mix cooked pasta, 2 tbsp water, and 20 drops of food coloring in a tightly sealed container. The pasta is fun to touch and explore and the older kiddos can have fun practicing their cutting skills.

Fake Snow: Mix equal parts cornstarch and baking soda and then add water in until you get a consistency that you can make a snowball.
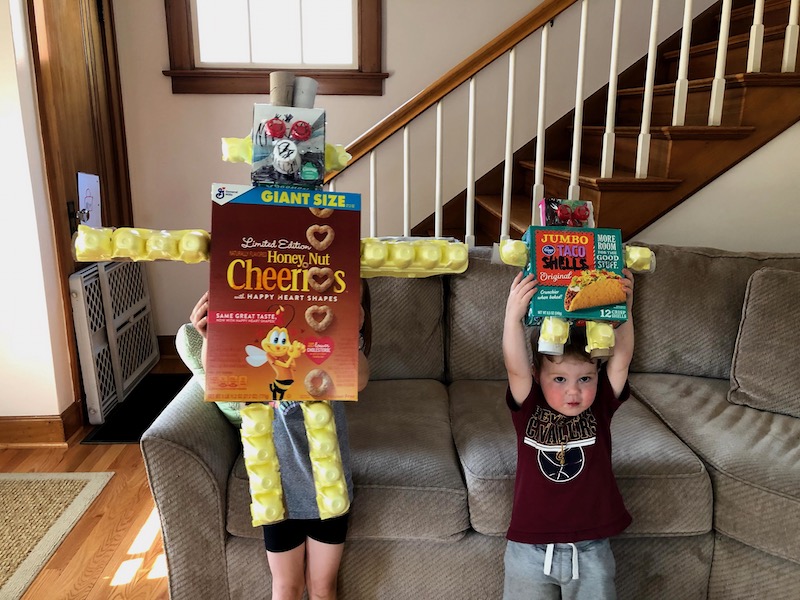
Recycled Robots: The supplies isn’t so much from your kitchen pantry, but the recycling bin. Save old cereal boxes, paper tubes, egg cartons, etc… and then get creative with making towns and people.
Sensory Play
Water Beads: We picked up these MarvelBeads and the bag has lasted 2 years. The beads are fun to scoop, pour, squeeze, etc.

Bubble Wrap Play: Tape the bubble wrap down and stomp or drive cars to hear the popping, squeeze the bubble wrap in your hands. Sensory Bins: Fill a container with taste safe items and let your child explore. Some favorite fillers include oats, wet/dry noodles, lentils, and rice.

Fluffy Slime: Mix 1/2 cup Elmer’s Glue, 2 cups foam shaving cream, 1/2 teaspoon baking soda, food coloring, and 1 Tbsp saline solution. The more the ingredients are worked together, the less sticky and more fluffy it becomes. You can then squish, pull, stretch, squeeze, and hide objects inside.
Tin Foil Play: This is a super simple activity that is loved. Take two sheets of aluminum foil and tape down to the ground. Baby will kick and slap the foil for a reinforcing sound, while older kids can drive cars and play the drums on the foil.  Shaving Cream: A super simple set up. Spray shaving cream in the bathtub/baby pool/sensory bin, and then go to town getting so messy in the shaving cream.
Instant Snow: Have you seen Speedy Snow? It comes in a little jar and grows to200x it’s size when mixed with water. The smell was questionable at first and I definitely wouldn’t recommend it there’s any chance your kid would put this in their mouth. We picked our up here at Lakeshore.
Water Play
Water play is fun in all forms. Fill the water table, sensory bin, tub, or sink and then use some of the ideas below to enhance the play. Sponges: Use big, little, rectangle, square, circle, and different colored sponges to squeeze, stack, push under. Cups: Use the cups to fill, pour, stack, sink, float etc.

Toy Wash: Find toys – clean or dirty – and scrub and rinse until the toy is sparkling clean. Pouring Station: Use containers of different sizes to pour water back and fourth from one container to another. Sea Foam: Mix up 2/3 cup water, 2/3 cup dish soap, and 2 tbsp cornstarch and pretend you are at the beach.
Process Art
Chalk Paint: Use a muffin tin to mix 2 Tbsp cornstarch, 4 Tbsp Water, and 6-8 drops food coloring/liquid watercolors. One color per spot. Paint the sidewalks and patio. The result will be more vibrant than traditional chalk paint.
Water Paint: Fill a cup with water and use a paint brush to paint the sidewalks or construction paper. Watch the water change the sidewalk and paper and then watch what happens when the water dries.

Contact Paper Window Scene: Tape contact paper with the sticky side out to the window. We have done a stained glass scene with tissue paper, construction paper rain drops, and filling the leaves in on a tree. Tissue Paper Bleeding: Place tissue paper onto paper, spray with a spray bottle to watch the color bleed, and then peel the paper off. The finished product is pretty cool!

Paint Dotters: We have the Do A Dot Art! Set and after extensive use they are still painting. Paint everything from paper to cardboard boxes. Duplo Stamping: Use duplos as stamps by dipping in paint and pressing onto the paper. Puffy Painting: Mix equal parts shaving cream and glue with food coloring for a new take on painting. Kindness Rocks: Join the Kindness Rocks to spread inspiration and motivation for unsuspecting recipients through random inspirational rocks dropped around the community.

Bubble Wrap Stamping: Tape bubble wrap down and cover with paint. Press a piece of paper onto the bubble wrap to create a fun texture on the paper. Salad Spinner Spin Art: Place paper with dots of paint at the bottom of the salad spinner. Spin until the desired look is reached.

Box Art: Turn an old box into a spaceship, a car, or a submarine with some paint, stickers, and glue.
Science Experiments
Color Mixing: Use food coloring/liquid water color to color water in a variety of cups and pitchers. Use an eye dropper to transfer water or pour the water from one container to another to mix and see what happens.
Fizzy Eggs: Mix 1 cup baking soda with 3/4 cup 2-in-1 shampoo. Pack the mix around your creature of choice into an egg shape. Let the eggs dry over night. Set your child up with an egg, vinegar, and an eye dropper. With a combo of the vinegar and some digging, the eggs will fizz and begin to reveal the creature inside.
Milk Experiment: Drop food coloring on a thin layer of milk. Use a q-tip to dab dish soap on the food coloring and then watch the color spread out. The result is seriously cool!
Experimenting with Fizzy Colors: Drop 6 drops of food coloring at the bottom of the muffin tin and then eyeball a layer of baking soda to cover the color. Use an eye dropper to transfer vinegar into the tin to watch it fizz and reveal a color.
Oil & Water Mixing: Mix equal parts oil & water and 5 drops of food coloring in a taped down plastic bag or tightly sealed water bottle. Watch and see what happens as the liquid is pushed around in the bag or the bottle is turned upside down.
Candy Rainbow Experiment: Place skittles in a shallow dish and then pour hot water into the dish, but don’t submerge the candy. Watch the candy dissolve and create some pretty fantastic designs.

Cooking
Cooking with kids is always a learning experience. Click here to read how cooking can promote language and then try one of the following recipes. Green Smoothie: Smoothie making is an easy way to mix up a tasty and healthy treat. Click here for a green smoothie recipe from the archives. Lemonade in a Bag: Click here to see the full activity with a kid friendly printable recipe.

Guacamole: Mix and mash the ingredients to create a tasty dip. Click here to read all about it. Ice Cream in a Bag: This activity is always a hit with all ages. Click here for the recipe and how to. Pizza Bagels: Try this easy recipe that the kids can help with or make completely on their own. Snow Ice Cream: Our recipe is to mix together 3 cups snow, 2 tbsp milk, 1/2 tsp. vanilla, 1/8 cup sugar, and of course add sprinkles on top.

DIY
DIY Light Box: This DIY light box can be used to explore objects with the added dimension of upward facing light. It can be used for investigating silhouettes, color mixing, and liquid/gel pouches.

DIY Shakers: Fill a tightly sealed bottle/container with different materials (rice/corn kernels/pennies) and shake and listen to determine if the different materials create different sounds.

DIY Sensory Bottles: These quiet sensory bottles are also known as calm down bottles. The bottles can be filled with oil/water, water/soap, water/soap/glittler, and food coloring. The directions for our favorite glitter calm down bottle can be found here.

These activities are great for a variety of ages. If you have children on the younger side, please be mindful of what the child is putting in his mouth – as all materials suggested in this post are not taste safe.